Monday, March 1, 2021

Exploring the Upper Peninsula...and a Few Yummies


I am going to make this short...because I am desperately trying to be more intentional with my time.  Spending less of it on my phone or computer. 

Let me tell you...it is FREEING!!

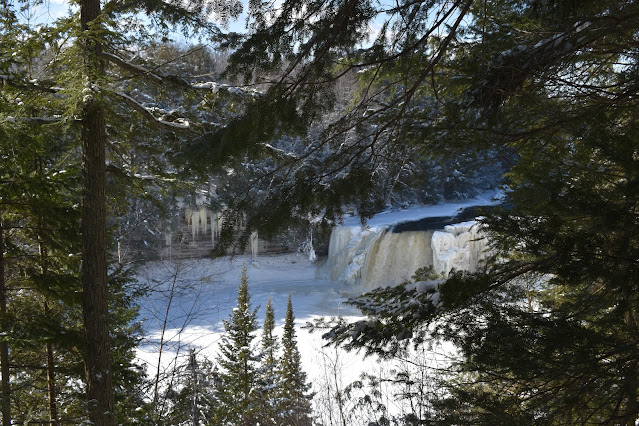
I actually thoroughly enjoyed our day trip to Tahquamenon Falls, without worrying about Instagram or Facebook posts. Just me and my family. The only pictures I took were with my Nikon.

Enjoy!!

(Side note: I know these pictures are really dark...I am working on finding editing software that I like.)


And...I wouldn't be me if I did not include some food shots...

Sunday dessert...

cherry pie.


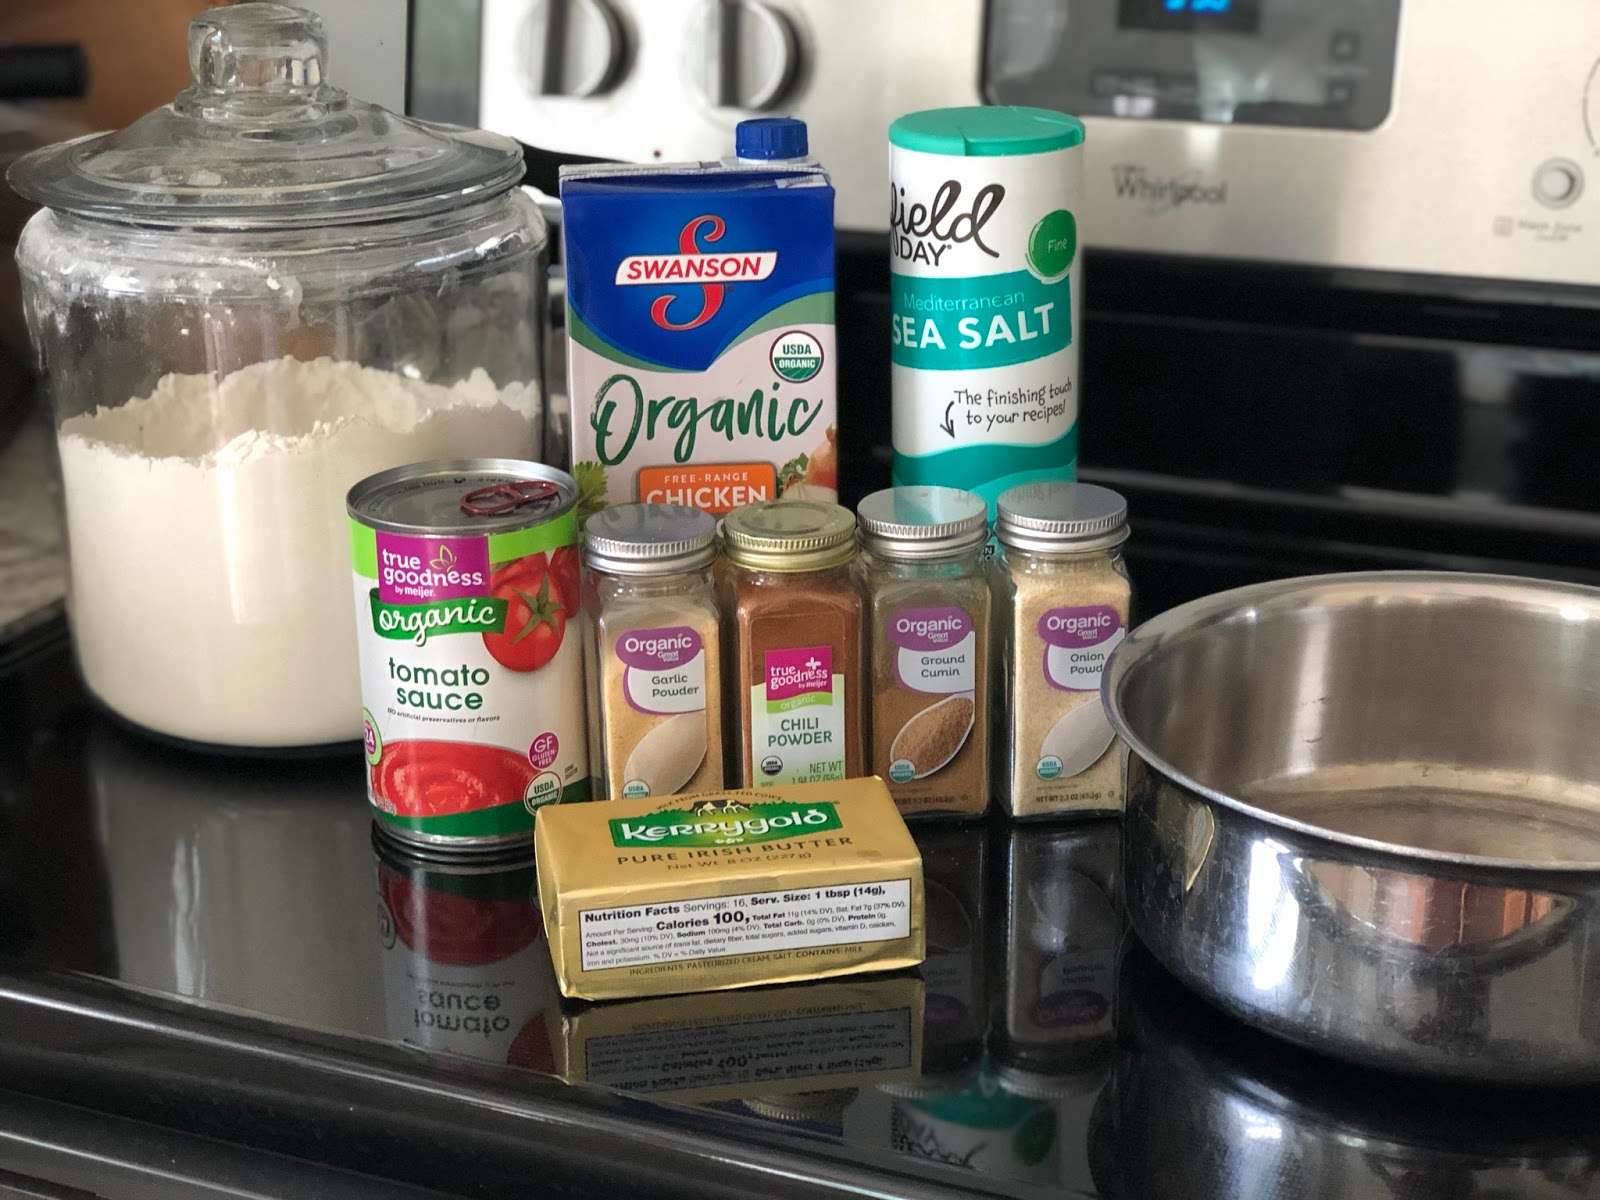
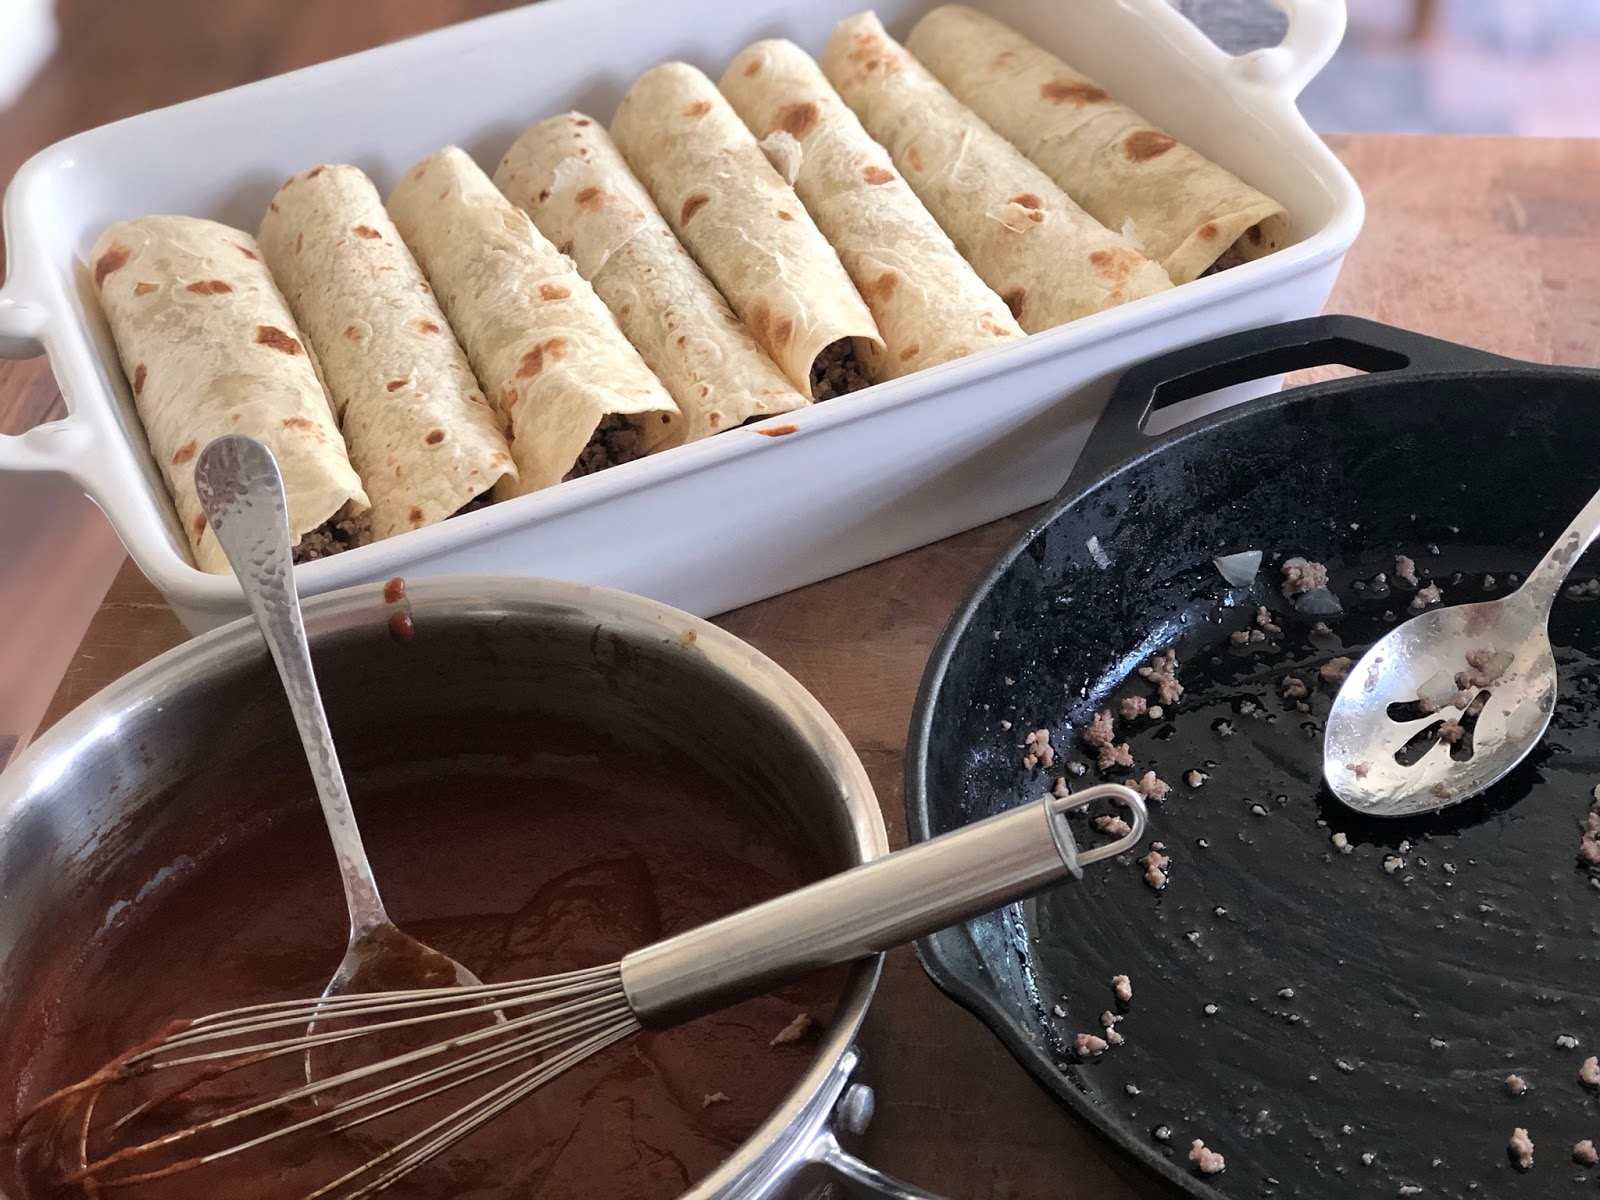
I also revived my Taco Lasagna recipe from almost TEN years ago!


I swapped in organic ingredients this time. I am pretty sure none of these organic options were even available when I first published it. 


SO delicious. 

I have included a new recipe card printable at the bottom of this post. It will become a new favorite I am sure.


A few of my lunches lately. 

I made some pickled onions...and have been eating them on EVERYTHING!


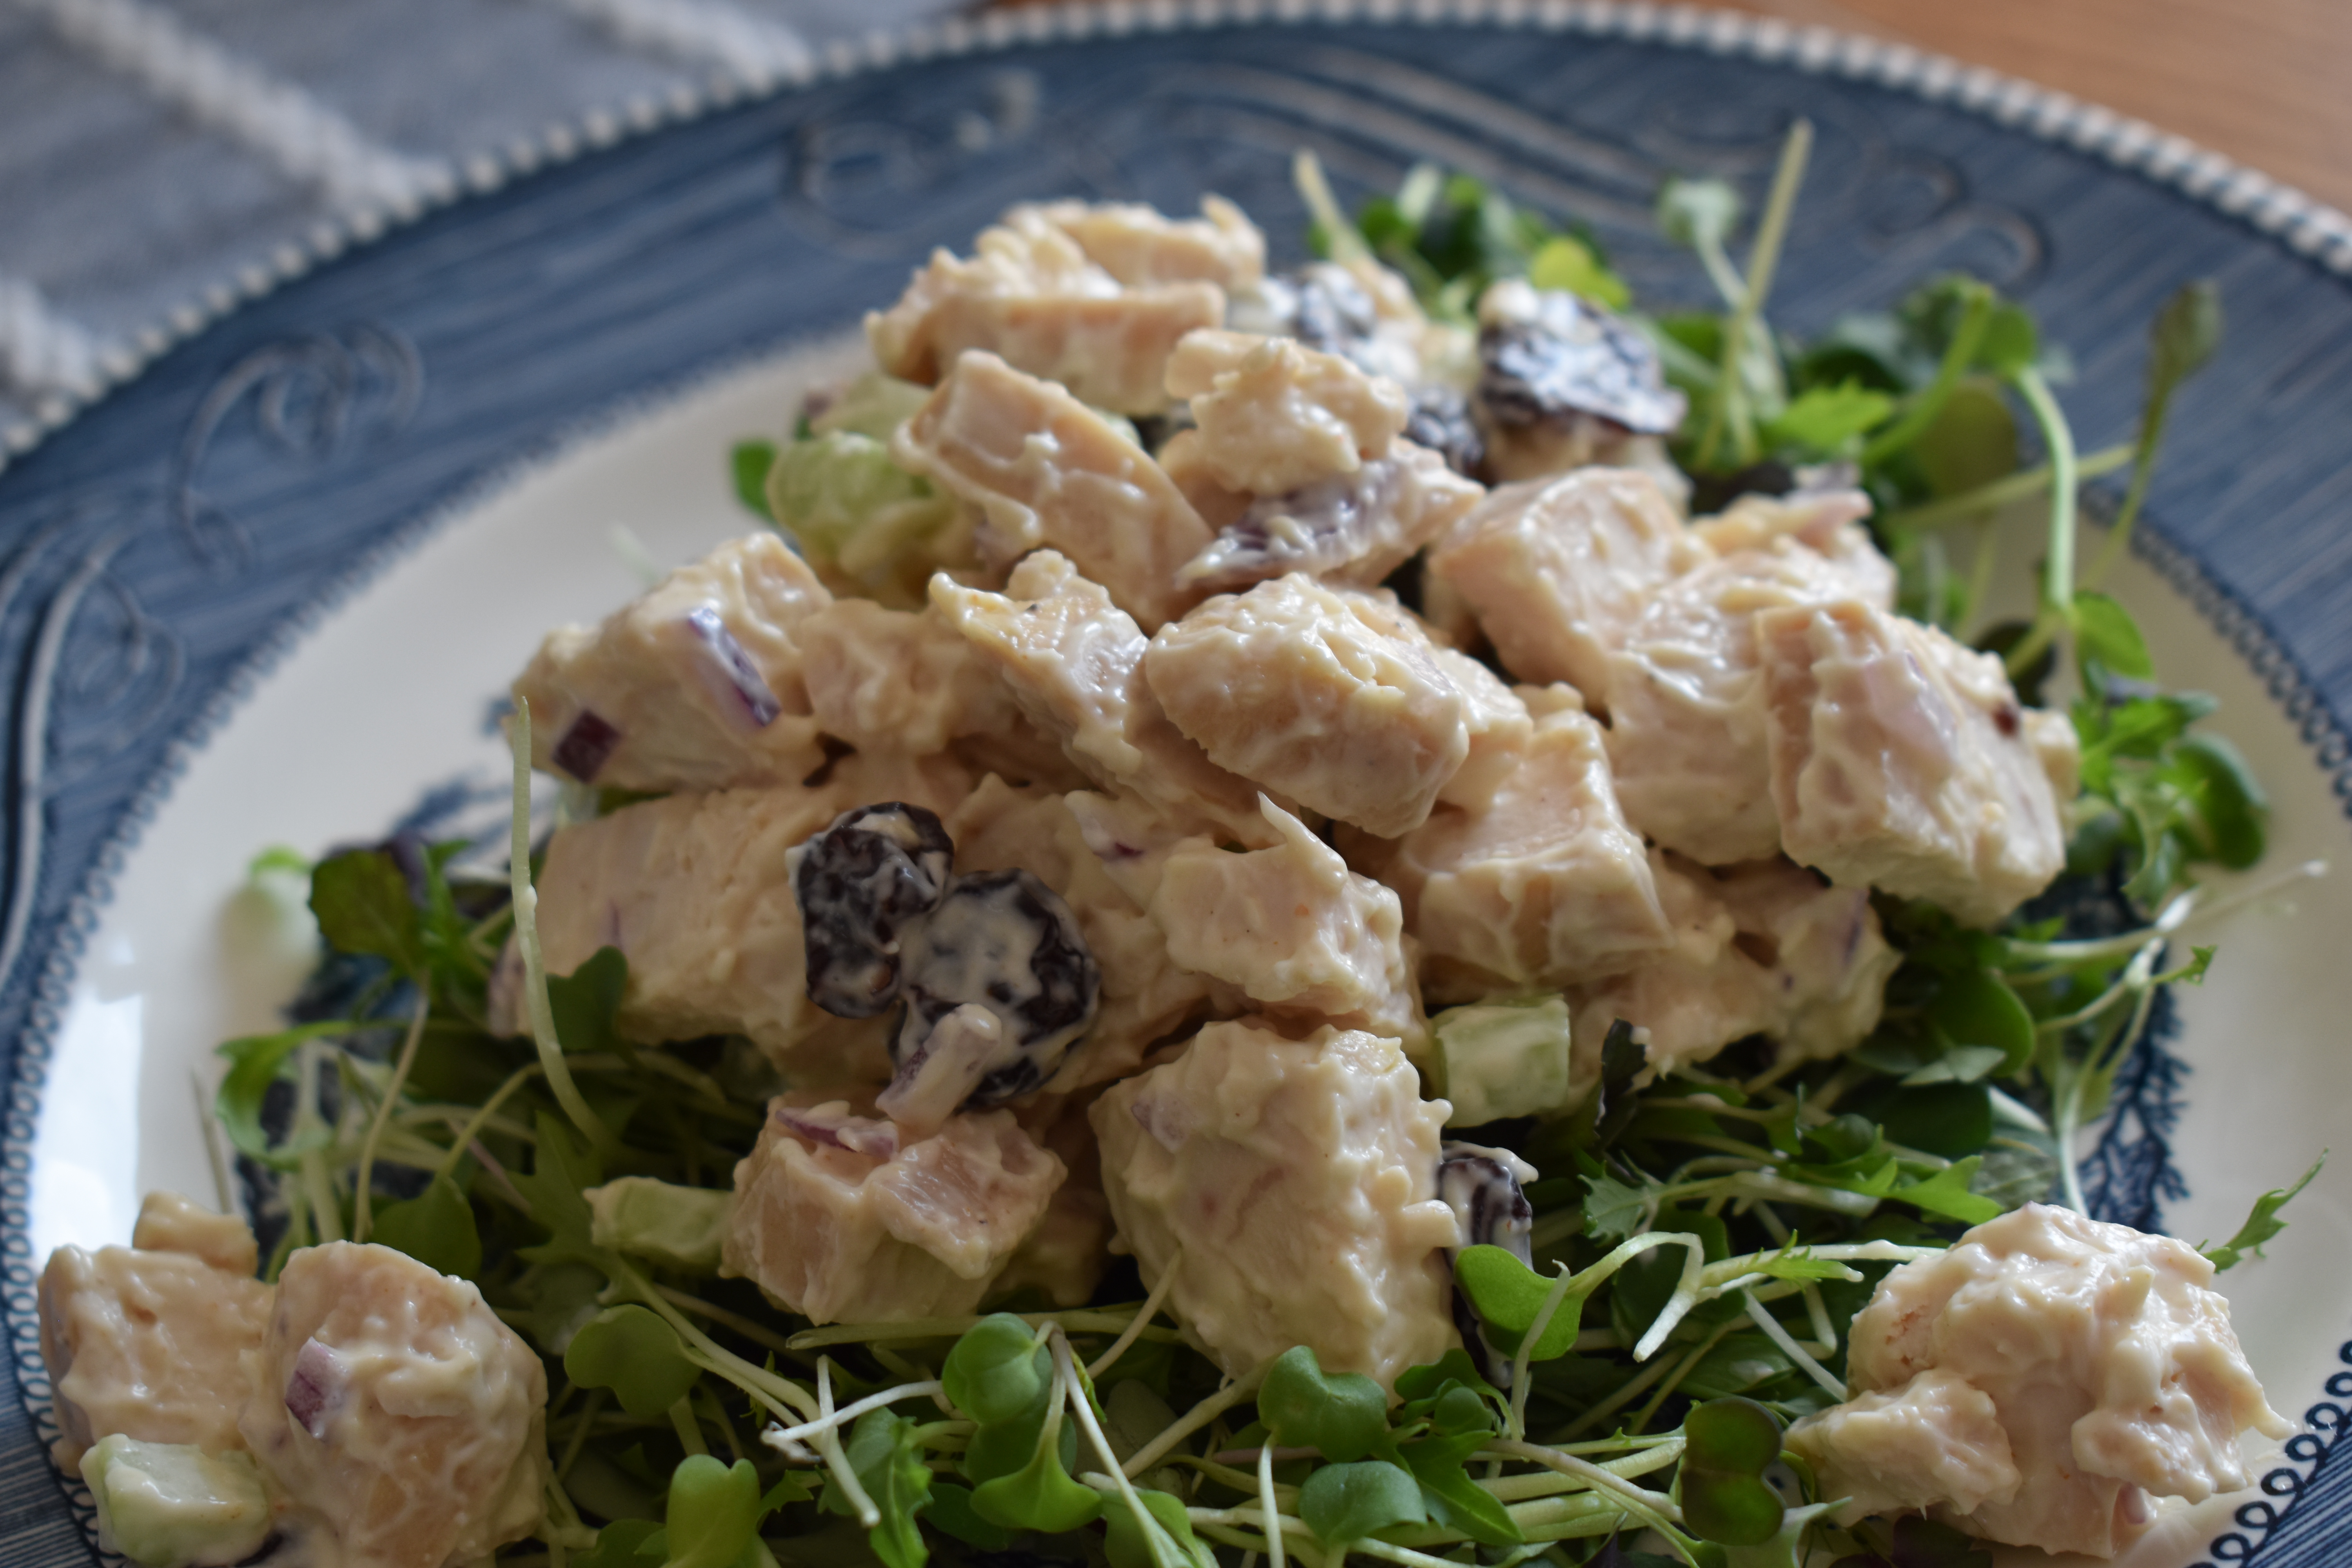
Our local organic farm has microgreens in stock once again...
I feel like spring will be here soon!

I will be back later this week with that Cabbage Roll recipe I have been promising for months.


Jessie


Taco Lasagna

Taco Lasagna
Yield: 12
Author: Jessie Saxton

Ingredients

  • 2 lbs. grass fed ground beef
  • 1 medium yellow onion, chopped
  • 1 can diced green chilies
  • 1 -28oz can tomato sauce 
  • 1 heaping tablespoon chili powder
  • 1 ½ teaspoons garlic powder
  • 2 teaspoons cumin
  • ½ teaspoon oregano
  • 1 teaspoon sea salt
  • A pinch of cayenne pepper
  • 10-12 taco size tortillas
  • 1 can refried beans
  • 8 oz. Monterrey jack cheese, shredded
  • 8 oz. sharp cheddar, shredded
  • 1 bunch green onions (optional)
  • Sour cream (optional)
  • Black olives (optional)

Instructions

  1. Brown the ground beef in a large skillet over medium heat. 
  2. Add the chopped onion to the ground beef and cook for another 2 or 3 minutes, or until onion is tender, stirring occasionally. 
  3. Stir in chili powder, garlic powder, cumin, oregano, salt and cayenne. Cook for 1 minute. 
  4. Add the diced green chilies and the can of tomato sauce. Bring to a simmer. Turn heat to low and let simmer for 20 minutes.
  5. Spread 1 cup of the meat mixture into the bottom of a 13x9 casserole dish. 
  6. Top with 5 of the tortillas. You may have to cut the tortillas in half to make an even layer. 
  7. Spread ½ of the can of refried beans on the tortillas. 
  8. Top with half of the remaining meat mixture. 
  9. Layer ½ the shredded Monterrey jack, and ½ the shredded sharp cheddar on top of the meat mixture. 
  10. Top with the remaining 5 tortillas, cutting them as needed to make an even layer. 
  11. Spread with the remaining beans, and layer with remaining meat mixture. 
  12. Top with the rest of the shredded cheeses.
  13. Cover with foil, being careful that cheese does not touch the foil, and bake at 375° for 30 minutes. 
  14. Remove foil and bake for an additional 10-15 minutes, or until cheese is browned and bubbly.
Created using The Recipes Generator

Wednesday, February 17, 2021

Ash Wednesday...and Tuna Casserole From Scratch


This casserole is delicious, and a Lenten staple in our house. My favorite part is that it eliminates to need for canned cream of mushroom soup, which contains many ingredients that are unnecessary and harmful to our bodies.


Plus, it is just plain better than the traditional version.

I hope that you will give it a try!


Jessie


He who conceals his transgressions 
    will not prosper,
 but he who confesses and and forsakes
     them will obtain mercy.

   ~Proverbs 28:13


Tuna Casserole From Scratch

Tuna Casserole From Scratch
Yield: 6-8
Author: Jessie Saxton

Ingredients

  • 16 oz box small shell pasta
  • 8 tablespoons butter
  • 1/2 cup onion, finely chopped
  • 1/3 cup celery, chopped
  • 1 clove garlic, minced
  • 8 oz button mushrooms, sliced
  • 1/4 cup all purpose flour
  • 2 cups whole milk
  • 2 cans tuna, drained
  • 1 cup frozen peas
  • 1/4 cup panko bread crumbs
  • 1 cup (4 oz...you can add more if you like!) shredded cheddar cheese
  • Salt & pepper to taste

Instructions

  1. Preheat the oven to 375 degrees.
  2. Bring a large pot of water to a boil.
  3. In a six quart ovenproof pot, melt 2 Tbsp of butter. Add onions and celery. Cook for 5 minutes over medium-low heat. Add garlic and cook for an additional minute. Add sliced mushrooms. Turn heat up to medium and cook until liquid evaporates from the mushrooms, about 5-8 minutes.
  4. Salt the pasta water and start cooking the noodles.
  5. Add 1/4 cup of butter to the pot with veggies. Once melted, add the flour, stirring constantly for 2 minutes. Slowly add 2 cups of milk, stirring constantly until thickened and bubbling. Add salt and pepper to taste. Stir in peas and tuna.
  6. Drain noodles, and add to the cream mixture, stirring gently.
  7. Combine panko bread crumbs and 2 tablespoons of melted butter. Sprinkle over top of the tuna casserole. Sprinkle with cheese.
  8. Bake for 25 minutes.

Notes:

If you do not have an ovenproof pot, add the noodles and veggie/cream/tuna mixture to a casserole dish, add bread crumbs & cheese, then bake.

Monday, July 27, 2020

The Perfect Classic Cheesecake


Hello, friends! Have I got an amazing recipe for you. The most perfect, creamy, silky, delicious cheesecake of all time. Tested and perfected. Being the Golden Girls lover that I am, would you expect any less?

The trick to creating this masterpiece is the baking method. A little lower and longer than your average recipe, over a pan of steamy water, and cooled slowly over time. Trust me. This is the ticket to a divine, crack free cheesecake.

In the past I have tried wrapping my springform pan in layers of foil, and baking it in a roasting pan of boiling water...only to have the crust turn out soggy, because there will inevitably be a leak somewhere. By placing the pan of water on a rack underneath the cheesecake, you completely eliminate this problem, while still adding much needed moisture to your oven. The lower baking temp also aids in the retention of moisture. 

Another key element to this recipe is the crust. I decided to increase the amount of butter I had been using, and also forgo the prebaking. The result is a firmer, less fragile crust, that stands up to refrigeration with an exceptional texture.


The most difficult part of this recipe is seriously the wait. I can be an instant gratification kind of girl. Cheesecake takes time. Hours of cooling and refrigeration. It is so worth it in the end, though. 


By the way. Homemade caramel sauce is my new favorite way to eat cheesecake. 

If you would like to see my full tutorial, it is available on my Instagram page in my Saved Stories
 
Thanks for reading!! 

Jessie


Classic Cheesecake

Print
Classic Cheesecake
Yield: 8-12
Author: Jessie Saxton
Prep time: 20 MCook time: 1 H & 15 MTotal time: 1 H & 35 M
A rich and silky cheesecake, guaranteed to become your new favorite dessert.

Ingredients:

Graham Cracker Crust
  • 1-2/3 cups graham cracker crumbs
  • 1/4 cup brown sugar, lightly packed
  • 7 tablespoons melted butter
Cheesecake Filling
  • 4-8 ounce packages cream cheese, softened
  • 1 cup white sugar
  • 1 cup sour cream, at room temp
  • 3 large eggs, plus 1 yolk, at room temp 
  • 2 teaspoons pure vanilla extract
  • a pinch of sea salt

Instructions:

Crust
  1. Combine the graham cracker crumbs, brown sugar, and melted butter until all ingredients are evenly distributed and a crumbly mixture forms. 
  2. Lightly grease a 9 inch springform pan with butter. 
  3. Press the crust mixture into the bottom, and about 2/3 of the way up the sides, of the pan.  Using a glass to press crumb mixture into the pan makes quick work of this. Set aside to make  the filling.
Cheesecake
  1. Preheat oven to 325 °. Start a kettle of water to boil (for steaming cheesecake as it bakes in the oven).
  2. In the bowl of a stand mixer (or a large mixing bowl), beat cream cheese at medium speed until no lumps remain, scraping down the sides of the bowl as needed. Do not over mix.  Add the sugar.  Mix until it just starts to look creamy and smooth again. Next, add the sour cream and vanilla.  Continue to mix on medium speed until the mixture develops a silky, smooth texture, scraping down the side as necessary. Begin adding the eggs, one at a time, until each is just combined. Scrape the bowl down after each addition. Add the egg yolk, and continue to mix on medium-low until filling is silky and no lumps remain. DO NOT OVER MIX. This will take away from the texture.
  3. Pour filling into the graham cracker crust and smooth the top.
  4. Place a pan of boiling water on the lowest rack of the preheated oven. 
  5. Put cheesecake on the center rack, situated directly above the pan of boiling water.
  6. Bake for 75 minutes. Cheesecake is done when the edges puff up slightly, and the center is set, but still jiggles a bit. 
  7. Do not remove the cheesecake, but allow it to cool in the oven for an hour, with the oven door propped open slightly.
  8. After one hour, remove to cool completely on a counter top or table (1-2 hours).
  9. Cover with plastic wrap and refrigerate for at least 8 hours, preferably overnight.
Created using The Recipes Generator

Wednesday, January 15, 2020

Wholesome Muffins...3 Ways


Guys, I am going to be honest with you...I have more muffin recipes than anyone probably should. 

There is just something about them. You can eat them any time of day. And with the right ingredients, they can be pretty nutritious. 

Once I discovered the existence of whole wheat pastry flour I couldn't help myself from creating and converting recipes. You can purchase this at health food stores...or order online. Bob's Redmill makes my favorite Organic Whole Wheat Pastry Flour.

My favorite thing to do is make several batches on a Sunday afternoon, and store them in my freezer. Like almost immediately. This locks in their moisture


They are perfect tucked into my kids' lunches.


Because I have a sick kiddo right now...and you are all really just here for the recipes...I am not going to drag this out...

Here are 3 of my best muffin recipes


Chocolate Chip Zucchini Muffins


  • 2 cups whole wheat pastry flour
  • 3/4 tsp baking soda
  • 1/2 tsp baking powder
  • 1/2 tsp salt
  • 2 tsp cinnamon
  • 2 eggs
  • 1/2 cup coconut oil
  • 1/2 cup buttermilk
  • 2/3 cups coconut sugar
  • 1 tsp vanilla extract
  • 2 cups grated zucchini
  • 1/2 cup mini chocolate chips
  1. Whisk together dry ingredients (except chocolate chips).
  2. In a separate bowl, mix the wet ingredients (except zucchini)
  3. Pour the wet ingredients over the dry, and gently fold together, until just combined.
  4. Fold in the zucchini and chocolate chips.
Bake at 375 degrees for 20-24 minutes.


Blueberry Pancake Muffins


  • 2 cups whole wheat pastry flour
  • 3/4 tsp baking soda
  • 1/2 tsp baking powder
  • 1/2 tsp salt
  • 2 eggs
  • 2/3 cup maple syrup
  • 3/4 cup Greek yogurt (full fat)
  • 1/2 cup melted coconut oil
  • 1 tsp vanilla extract
  • 1 1/2 cup blueberries (thawed frozen are fine)
  1. Whisk together dry ingredients.
  2. In a separate bowl, mix the wet ingredients.
  3. Pour the wet ingredients over the dry, and gently fold together, until just combined.
  4. Fold in the blueberries.
Bake at 375 degrees for 20-24 minutes.


Bran Muffins


  • 1 1/4 cups whole wheat pastry flour
  • 1 1/2 tsp baking soda
  • 1/4 tsp salt
  • 1 egg
  • 2/3 cup maple syrup
  • 1 cup buttermilk
  • 1/4 cup melted butter
  • 1 1/2 cups bran flakes cereal
  1. Whisk together all of the dry ingredients (except cereal).
  2. In a separate bowl, mix the wet ingredients.
  3. Pour the wet ingredients over the dry, and stir until combined.
  4. Fold he bran flakes into the batter.
  5. Cover and refrigerate for at least 8 hours.
Bake at 375 degrees for 18-22 minutes,
Makes 12 muffins.


Monday, September 16, 2019

Simple Enchiladas


So...here I am...back for my yearly post. I am at the point where I am making no promises to myself, or anyone else, regarding my post frequency. I feel like I say I will post more and automatically set myself up for failure. We'll just view the blog as a place where when I feel compelled to post, I will.

And I feel really compelled to post these delicious, super easy enchiladas. They are for sure a top five with my family. The beauty of them is...you can pretty much fill them with whatever you like. All ground beef, all pork, ground turkey or chicken, even roasted veggies or sweet potatoes. We love them with a mixture of local ground beef and pork, so that it how I wrote the recipe. The best part, in my opinion, is the way the tortillas soaks up the enchilada sauce and combine with the melted cheese. Add some crunchy romaine and a spoonful of sour cream or guacamole...perfection.

I will leave you all with some super fancy iPhone pics...and of course, THE RECIPE!


Simple Enchiladas


  • 1 lb grass fed ground beef
  • 1 lb ground pastured pork 
  • 1 tsp sea salt (more if needed)
  • 1 large yellow onion, chopped
  • 4 cloves of garlic, minced
  • 8 organic flour tortillas
  • 8 oz. cheddar cheese (or combo of cheddar and Monterrey Jack), shredded
  • Enchilada sauce (recipe follows)

Directions:

  1. Preheat Oven to 375 degrees
  2. Cook beef and pork in a large skillet, over medium heat, breaking it up with a spoon or spatula, until crumbly and no longer pink. 
  3. Add onions and salt. Cook until the onions are translucent. 
  4. Add the garlic, cooking for an additional 2 minutes. 
  5. Remove the pan from heat.
  6. Spread about 1/2-3/4 of a cup of enchilada sauce in the bottom of a 13"x9" casserole dish. 
  7. Using a slotted spoon (to allow grease to drain), fill each tortilla with 1/8 of the meat mixture and roll up, laying them seam side down in the pan, side by side. 
  8. Spread remaining sauce evenly over the tortillas. 
  9. Top with shredded cheese. 
  10. Bake on the middle rack of the oven, uncovered, for 25-30 minutes, or until cheese is melted and starts to brown.


Enchilada Sauce


  • 2 Tbsp butter (grass fed)
  • 2 Tbsp organic AP flour
  • 1/4 cup chili powder
  • 1 tsp garlic powder
  • 1 tsp onion powder
  • 1/2 tsp cumin
  • 8 oz. tomato sauce
  • 1 1/2 cups chicken stock
  • Salt to taste

Directions:


  1. Melt butter in a medium saucepan, over medium heat.  
  2. Add flour and whisk until bubbling. 
  3. Continue to whisk continuously for 2-3 minutes, creating a roux. 
  4. Add spices. 
  5. Whisk for 30 seconds, then add the tomato sauce. 
  6. Slowly whisk in the chicken stock. Once mixture is bubbling, and slightly thickened, reduce heat to low. 
  7. Taste to see if salt needs to be added.
  8. Allow sauce to simmer for 15-20 minutes, stirring occasionally. 

Once the sauce cools it can be stored in a tightly closed jar in the refrigerator.


Exploring the Upper Peninsula...and a Few Yummies

I am going to make this short...because I am desperately trying to be more intentional with my time.  Spending less of it on my phone or com...